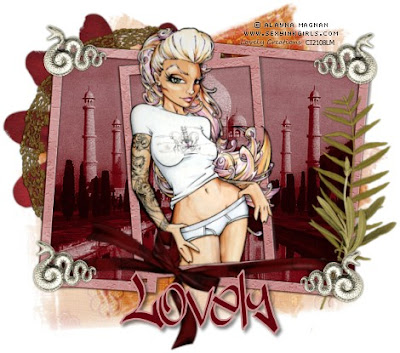
This tut is written for those with a basic knowledge of psp. I use psp 10.
Supplies needed:
Template: Template 1 from Beth at Creative Misfits.
Supplies needed:
Template: Template 1 from Beth at Creative Misfits.
Tube of choice. I used the artwork of Sonia Roji which can be purchased here: MPT
Scrap kit of choice. I used Sweet Dreams from Baby Cakes Scraps.
----------------------
Let's get started :)
1. Gather your supplies and open your psp. Open your template copy as a new image (shift/D). Delete copyright layer.
2. Use your magic wand select inside lt gray frame background. Take a paper and paste it as a new layer above the selected layer. (I used paper N) Invert selection (ctrl/shift/I) then hit delete, and select none (ctrl/D). Merge layer down.
3. Use your magic wand select inside the dk gray frame layer. Take another paper and paste it as a new layer above the selected layer. (I used paper H) Invert selection (ctrl/shift/I) then hit delete, and select none (ctrl/D). Merge paper layer down.
4. Repeat step 3 with the black frame area of the white frame layer. Use the same paper.
6. Use your magic wand select inside white frame layer. Take a paper and paste it as a new layer above the selected layer. (I used paper J) Invert selection (ctrl/shift/I) then hit delete, and select none (ctrl/D).
7. Instead of using a paper for the strips behind the frame, I used two elements. Take Border element - resize to your liking, layer this where two of the strips are placed. Delete the strips when done. give Border a drop shadow..
8. Repeat step 7 on the two other strips, using a different ribbon or border piece.
9. Paste Cluster Frame above background layer. Resize to your liking.
10. Paste Long Bow A above White frame layer. Resize to your liking and Position to the upper right corner of larger frame. give drop shadow.
11. Paste jewel element above long bow A, resize to your liking and position directly over the bow. give drop shadow.
12. Paste Clipped flower above White frame layer. Resize to your liking and position to the lower right corner of larger frame. give drop shadow.
13. Paste blossom A as new layer, resize to your liking and position to upper left corner of larger frame. Give drop shadow.
14. Paste magnolia as new layer, resize to your liking and position to lower left corner of larger frame. Give drop shadow.
15. Paste your tube as a new layer above white frame layer. Re size and position to your liking. Apply drop shadow to your tube.
16. Add any word art or other elements you want to your tag. Resize and position to your liking. Remember to drop shadow :)
16. Crop and resize tag to your liking (if you prefer a smaller tag like me).
17. Add your name at the bottom of tag, I used Freestyle Script font at 100 pixels. apply drop shadow.
18. Add in any artist, copyright, & license info and voila! Your tag is done :)


